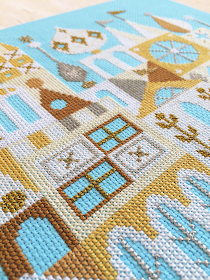
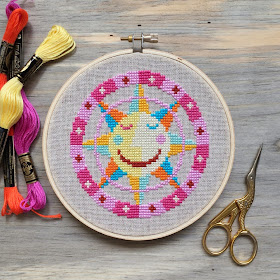
I had never heard of a "biscornu" until recently, but it seems they have been all the rage in cross stitching for some time, and I just love their quirky little shape, so I thought I'd try my hand at designing them. My
elephant biscornu was my first attempt, and it was so fun, I did another! This time I thought I'd do my "satsuma" name proud and designed a funky little citrus motif. I love this little orange so much, I've made it my Satsuma Street icon! The pattern and a printable version of this tutorial are available
in my shop now.
There are many excellent tutorials out there for making biscornu, but I get asked for directions quite frequently, so I thought I should post my own. Once you get the hang of it they are really quite easy, and you'll be making them as gifts for everyone you know!
So, let's get started. Biscornu are traditionally made using Aida cloth or evenweave linen, my sample is stitched on 28 count linen over two threads. In addition to your cross stitch fabric and floss, you will need some type of stuffing, heavy sewing thread, and two buttons with a shank. I use 1/2" buttons in this sample.
The most important thing to keep in mind when making a biscornu is that each piece must be exactly square, and have the same number of back stitches around the edge on all sides. Your pattern can have even or odd number of stitches, this pattern is 72 stitches square.
The first step is to stitch your cross stitch charts onto two squares of fabric. Make sure to also work the row of back stitches all the way around the chart as shown below. (click any of the photos to see them bigger!)
When you're done with the cross stitching, press both your pieces of fabric well. Trim your excess fabric to 1/2" outside the back-stitched border. It's a good idea to finish the edge of the fabric so it doesn't unravel while you're assembling the pincushion, you can either zig zag the edge on a machine or whip stitch by hand.
Knot a piece of floss that matches your back-stitched border and bring your needle up through the fabric at a center point on one side of the border of your top fabric. Line up that point with a corner point on your bottom fabric. You can finger press the seam allowance, turning under so that the back stitching is right on the folded edge.
Sliding your needle under the back stitches but not catching the fabric, begin to whip stitch the two pieces together, making sure to catch one stitch from each border every time. If you start stitching to the right, your needle should slip under the first stitch to the right of center on your top piece, and then also under the first stitch to the right of the corner point on the bottom piece, before you pull your needle and floss all the way through. You can flip the pieces so the bottom fabric is on top if that is more comfortable, but keep the direction of the whip stitching the same.

Keep the tension of your whip stitch consistent but not too tight. Keep checking as you go to make sure you are matching up your borders correctly and haven’t skipped any stitches. I find that the whip stitching has to be done in very bright light and at a very relaxed pace in order to go well. You really don't want to have to pull out this whip stitching, if you do you might also mess up the back stitch border. So take your time!
When you reach the corner, you should now have lined up the corner point of one piece to the center point of the other. If you did skip a stitch accidentally along the way, you can make it up here by taking two whip stitches in one side of the corner and it won't be too noticeable. If you're more than one stitch off however, you should probably pull out your stitching to the point that a stitch was skipped.
Don’t pull corner stitches tightly, thinking it will make sharper corner points, just keep a normal tension. At first it won't seem possible that the points will look good, but after you do 3 or 4 corners, you see the biscornu start to take shape.
Stop whip stitching (you don't need to knot your floss and cut it, you'll be finishing that stitching in a moment) when you are about 4 inches from finishing to leave a space for stuffing. I use a combination of fiberfill and poly pellets, but any stuffing of your choice will work.
The stuffing should be quite full, remember you will be squishing the centers down with a button. When the cushion is fully stuffed, fold your edges inside and finish whip stitching them together.
The last corner stitch…
Before pulling the last stitch all the way through, pass your needle back through the loop in the floss. Then pull the stitch tight, making a knot (use this same method to secure your stitching if you run out of floss mid-way through the whip stitching and need to start a new piece).
After knotting your floss, slip your needle into the fabric and bring it out again about a half of an inch away.
Cut your floss close to the fabric, thus hiding the tail of your knot.
The stuffed biscornu, prior to sewing on the buttons:
Using heavy sewing thread (I like quilting thread for this as it's really strong), knot your thread and then bring your needle up from the bottom of the pincushion, exactly in the center. Thread your button onto the needle, and then go back through to the other side, pulling tight. I like to go through the button several times to be sure it's secure. Once the top button is on, repeat the same step to sew on the bottom button, which should hide your knot. Knot your stitching and hide and cut the tail as shown in the steps above.
And congratulations, you have made a biscornu! Now get to work, because all your friends will want one too!
happy stitching!
xoxo Jody


